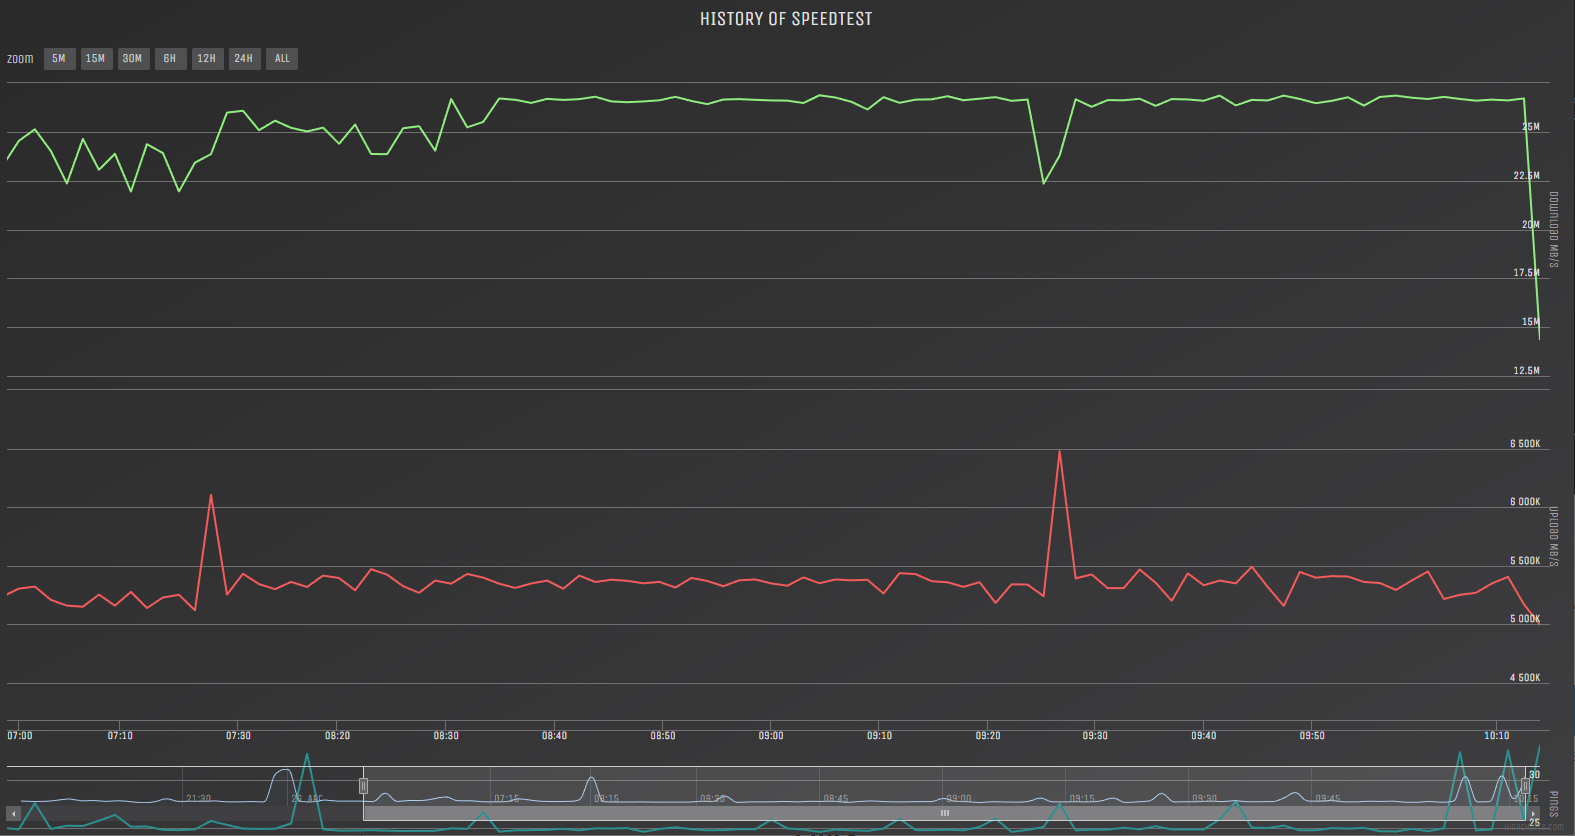
Recently, our office has moved from a FTTP to a FTTN connection. Our office is located about 500-550m from the node which should mean speeds of 40-50mbps are attainable – though to date usually at most the attainable speed is just 27mbps.
As a result speeds are drastically lower than what is being paid for with my Internet Service Provider – which is no fault of their own.
As part of my investigation I have ensured all cabling within the premises is connected only to the FTTN port. I.e, there’s no complex ‘star’ setups running to old telephone ports within the premises.

Since ensuring this has been completed and all internal cabling is Cat5e and above I have commenced a minute-by-minute Speedtest. I first looked at Speedtest-CLI a Github project which enables speedtest.net tests to be ran from the command line. However, upon further investigation, I found a project called, Speed Logger by EricMann which is a Node.JS setup with a web interface showing the speed history – that interfaces with speedtest-CLI.
To get this up and going I installed this on a Raspberry Pi.

To install Speed Logger by Ericmann do the following:
- Open Terminal on the Pi.
- Execute – pip install git+https://github.com/sivel/speedtest-cli.git
- Then change to the speedtest-cli directory (cd speedtest-cli)
- Execute – python setup.py install
- Execute – pip install git+https://github.com/ericmann/speed-logger.git
- Change to the speed-logger directory and open the speed.js file in your editor of choice – Update the options according to your preference in the var section.
- Then execute “npm install” from the speed-logger directory. If this doesn’t work try,
- Run the app – node speed.js
- Check the log.csv after a few hours or go to the web interface of your pi on port 3131.
For a more advanced setup, I installed pm2 to enable the Speed Logger to run as a service and auto start.
- From terminal run, “sudo npm install -g pm2@latest”
- Change to your speed Logger Directory inside Speedtest-cli
- cd ~/speedtest-cli/speed-logger
- Execute, “pm2 start speed.js”
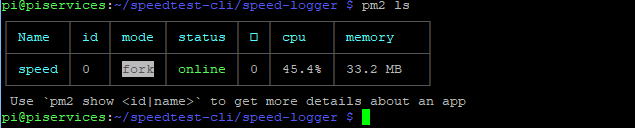
- After running the above command you should see a table similar to the below showing the Node.js application has been added to the list of programs for PM2 to execute.
- If you are unsure, run “pm2 ls” which lists all node’s running under PM2.

Finally, configure the env PATH to start PM2 on Startup. To do this run, “pm2 startup”. PM2 should then provide some instructions and a copy/paste command.
Once you have executed the command PM2 shows, you should be able to reload your PI and find the logging continues.